Showing posts with label sweet. Show all posts

Friday, July 01, 2011

Butter tarts

Butter tart is a true Canadian dessert. There are many different variations of it, runny, gooey, firm, with raisins, without raisins, with pecan, without pecans, chocolate...just name it. And there are probably as many recipes as there are Canadian grandmothers. Butter tarts are very sweet and when made with pecans they remind of baklava. Like the recipe that follows. These are also gooey, which is my favorite butter tart consistency.


Butter tarts
recipe adapted from here
makes 6

70 g flour
15 g ground toasted pecans
58 g butter
pinch of salt
about 1 tbsp cold water 

Cut the butter into small cubes, add flour, pecans, salt and with a pastry blender or food processor blend until you have grainy texture with some pea-size pieces of butter. Slowly add water and blend until everything comes together. Wrap and put in the fridge for at least 1 hour.
When the dough has chilled roll it out, cut out, line 6 muffin cups (or similar) and put in the fridge for at least 30 minutes. I use silicone molds (oval, each holding 100 gr water) as it is very easy to take out the tarts in case the filling leaks, which it almost always does.

Heat over to 200 C and blind bake the tart shells for about 15 min. Remove the beans and bake for another 10 min or until golden. 

In the meantime  make the filling.

40 g brown sugar
40 g maple syrup
40 g golden syrup
30 g melted butter
30 g egg
1/4 tsp salt
1/2 tsp vinegar
about 10 toasted pecan halves


Whisk all above ingredients except for pecans. Remove the shells from the oven and rise oven temperature to 230 C. Divide pecans over the shells and pour the filling into each shell. Bake tarts for about 10-15 minutes.

Sunday, May 01, 2011

Maple syrup tart

The maple syrup tart should be as famous as the chocolate tart. This Québécois recipe proves it, c'est magnifique.
The crust is flaky, very buttery and not sweet at all. Do not be tempted to use your favourite crust recipe. Use this one. It is perfect pair for the sweet, sweet maple filling. Thin slices of this tart will go long way and it tastes even better the next day. If you have dark maple syrup this a perfect occasion to use it.


Maple syrup tart
Recipe from here
112 gr cold butter
137 gr flour
about 35 gr cold water
pinch of salt
Cut the butter into small cubes, add flour and with a pastry blender or food processor blend until you have grainy texture with tiny (about 3 mm) pieces of butter. Slowly add water and blend until everything comes together. Wrap and put in the fridge for 2 hours or more.

200 gr maple syrup
60 gr cream 
50 gr butter
1/2 tbsp flour
80 gr eggs (about 2 small)

In a saucepan bring maple syrup and cream to boil. Remove from heat, add butter and flour and stir everything together. Set aside to cool. 

Preheat the oven to 190C. Roll the dough and line a 20 cm tart tin, the dough should come up the side by about 3 cm. Keep the left over dough as you might need it to fill any cracks in the baked shell. But keep it outside the fridge as it needs to be soft. Blind bake for about 20 min, then remove the beans and parchment paper and bake for another 15-20 min until golden. 
Because of the high amount of butter, this crust is going to shrink by 1/2 cm, which is totally ok.

Add eggs to the cooled maple syrup, mix well. If the shell has any big visible cracks cover them with the left over dough, pressing very lightly. Pour the maple filling into the hot tart shell as soon as you can. If you pour it into a cool crust the filling will find all tiny cracks to escape through. Hot tart shell makes sure that the filling cooks as soon as you pour it in. Decrease oven temperature to 150C and bake the tart for another 25 - 30 min.Voilà!


Sunday, August 15, 2010

Black Forest cake

Black Forest cake, or as it is called in German Schwarzwälder Kirschtorte, is one of my favorite cakes. Chocolate, cherries, cream and kirsch are meant to be together! And the kirsch is a must, without it you cannot really call it a Black Forest cake...and the more the better.

I found a recipe at the website of a company selling traditional clothes from Schwarzwald. They also have a detailed pictures of how the cake is put together. It is a great recipe!


Black Forest cake
recipe from
Trachten Winkler

chocolate-almond cake
200 g butter
200 g sugar
some vanilla
8 eggs
200 g cake flour
200 g ground almonds
150 g grated dark chocolate
zest of one lemon
2 tsp baking powder
short-crust
100 g powder sugar
200 g butter
1 egg
zest of one lemon and some juice
300 g flour
filling
50 g cherry marmalade
9 tablespoons kirsch (more or less)
8 dl whipping cream
150 g powder sugar
cherry filling
about 500 g fresh cherries or from a jar
about 150 g sugar
about 50 g corn starch
decoration
6 dl whipping cream
100 g powder sugar
150 g dark chocolate, grated
16 fresh cherries

If you can, make the chocolate-almond cake a day before because the next day  it is easier to slices it in three layers.
Preheat oven to 180 C. Line a 26 cm round cake pan with parchment paper on the bottom. In a small bowl put the flour, ground almonds, grated chocolate, lemon zest and baking powder.

In another bowl beat the room-temperature butter, sugar and vanilla until creamy and fluffy. Add room-temperature eggs one buy one until well incorporated. Add the flour mixture and with a spatula slowly mix until well blended. If you fell the mixture is too thick add some milk. Pour in the cake pan and bake for about 40 minutes. Check with a cake tester. Let the cake cool completely. If you are baking the day before, after it has cooled down wrap it in the plastic foil and refrigerate.

Now make the short crust. Beat the sugar and butter, add the egg. When fluffy add flour, lemon juice and zest. Roll out, about 2 cm thick and cut a 26 cm circle. Bake at 180 C degrees about 15 minutes.

If you use fresh pitted cherries for the cherry filling put them in a sauce pan together with the sugar. Cook on a low heat until they have softened and released the juice. In a small cup mix the corn starch and some water, add to the cherries and cook shortly until thick. Let cool.

If you use jar cherries, drain them from the juice. Put the juice in a sauce pan, add sugar and let it boil. Mix the corn starch with some cold water and when the cherry juice in boiling add it. Cook shortly until thick. Take of the heat and add cherries. Let cool.

Assembling the cake
Cut the chocolate almond cake in three layers.  Whip the cream and powder sugar for the filling. Spread the cherry marmalade over the short crust.


Top with one almond-chocolate layer and soak it with 3 tablespoons of kirsch. Spread two rings of cherry filling over the layer. Spread three rings of whipped cream around.

Cover with the second layer of almond-chocolate cake. Soak with 3 tablespoons of kirsch. Spread whipped cream. 


Top with the last layer  of almond-chocolate cake, soak with 3 tablespoons of kirsch. Refrigerate the cake for couple of hours or overnight.

Whip the cream and powder sugar for the decoration.Cover the whole cake with whipped cream. Mark the 16 slices with a knife and with a help of pastry bag pipe 16 whipped cream roses. Grate the chocolate and spread on the top and the sides. Top each cream rose with a cherry. Enjoy!

Thursday, July 15, 2010

Champurrado

Champurrado is another Mexican drink made with cacao beans that is really amazing. The difference from the Mexican hot chocolate is that ground corn is used to thicken it up (the same corn flour used to make tortillas) and it is not as sweet as the hot chocolate. If you have Mexican chocolate discs you can easily make champurrado by adding some corn flour until you have slightly thick chocolate.

However, last time we were in Mexico I picked up a bag of champurrado mix by a brand Kekua. The ingredients are: corn, sugar, cacao, cinnamon and soy lecithin. You add 3 tbsp of this mix to a cup of milk or water, boil it, froth it, done.


I really like this mix, it is perfectly sweet and thick, they just could have added a bit more of the cinnamon.

Friday, April 02, 2010

Kaiserschmarrn

Kaiserschmarrn is a traditional Austrian dessert...and a perfect Sunday breakfast if you ask me. It is made of a fluffy pancake that is split with fork into small pieces and it is served with apple or plum sauce.

Every Bavarian restaurant has Kaiserschmarrn on their menu and they can be very different in taste and texture. Some are light, some are dense, some are egg-y, some are not, some are caramelized, some have strong rum taste, many have raisins or sliced almonds, other not...plenty of variety out there.

I started with a recipe from Austrian/German chef Sarah Wiener and couple of Kaiserschmarrns later I found ingredient combination that makes my perfect Sunday breakfast.

Kaiserschmarrn
adapted from Sarah Wiener
serves 2
2 tbsp raisins
1 tbsp rum
3 small eggs
2 tbsp sugar
half a vanilla bean
6 tbsp milk
1 dl + 3 tbsp flour ( I use white spelt flour)
2 tbsp sliced almond
20 gr clarified butter ( I sometimes use coconut oil)

plum or apple sauce (room temperature, not cold from the fridge)
1 tbsp powder sugar + 1/4 tsp cinnamon

In a small bowl put the raisins add rum and let sit for about 30 minutes. Or if you do not have time, heat the rum until warm add the raisin, take off the heat and by the time you make the dough raisins will be nice and soft.

Separate the eggs, beat egg yolks with sugar and the vanilla seeds until the eggs are thick and light yellow in colour. Add the flour, whisk, add slowly the milk, whisking all the time to avoid the lumps.

Heat a cast iron pan (22 cm) on low heat and let the butter melt. In a separate bowl beat the egg whites until stiff. Add first a third to the egg yolk mixture, carefully fold in. Add the rest of the egg whites. Pour the mixture into the heated pan. Let it cook on low heat for about 10 minutes. Then sprinkle the raisins and almonds (or fresh fruits) over the pancake.


Now you need to turn around the pancake. The easiest way to do this is to put it in the oven until the top is set and gets colour, 10-15 minutes on 180C.

Or if you are brave enough (and do not mind the mess), take a biggest spatula you have, run it under the pancake and turn around. This method can be very messy but it does work. And to do not worry if the pancake breaks, it will be split in small pieces anyway. After you have turned around the pancake let it cook for another 5 minutes, or until it is nice and golden.

When done split it into small pieces with a a help of two forks. Serve on two plates, dust with the powder sugar and cinnamon, and eat with the apple sauce. Mahlzeit!

Wednesday, February 24, 2010

Banana bread

I wrote down the recipe for this banana bread from a bag of Gold Medal whole wheat flour when we lived in Shanghai. It is an excellent recipe for a moist banana bread that I have been using ever since. Sometimes I use spelt flour instead of whole wheat, sometimes I use olive oil or virgin coconut oil, recipe is quite adaptable.


I also use muscovado sugar and less of it. 1 cup and a 1/4 is just way too much for me so I used only 3/4 cup and the cake is sweet enough.
I have never tried to replace bananas with some other fruit bit the idea has crossed my mind.

Banana bread 
recipe from Gold Medal flour
1,5 C mashed very ripe bananas (about 3 bananas)
3/4 C brown sugar (or muscovado)
2 eggs
2/3 C cup yogurt
1/3 C vegetable oil (olive oil, virgin coconut oil...)
1 vanilla pod
2,5 C whole wheat flour (or white spelt flour)
1 tsp soda
1 tsp salt
1/2 C raisins (optional)

baking pan, 22 cm round with a hole in the middle

Butter and flour the baking pan. Heat the oven to 175 C. Mash bananas and melt coconut oil (if using). Mix eggs and sugar, add coconut oil, yogurt, bananas and scraped vanilla seeds. Blend flour, soda, salt and raisins and add to the wet ingredients. Mix until everything is well blended. Pour into the pan and bake for about 45 minutes. Cool completely, it tastes even better the next day(s).

Sunday, February 14, 2010

Nanaimo bar

Nanaimo bar is a Canadian cake and I thought it would make a perfect Valentine's cake this year. Olympics have started and Canada is the host. Nanaimo bar is made with chocolate and a cake with chocolate is a must on the Valentine's.


I found the recipe at the website of the City of Nanaimo and I followed the recipe almost to the point. I just did not use as much sugar, 2 dl was sweet enough, and instead of custard powder I used an egg yolk.

The bottom layer is very similar to the sweet salami I have made before. So if you want to reduce amount of butter you can replace it with melted chocolate and milk.

Nanaimo bar

serves 8
recipe from
Nanaimo.com

113 gr butter (room temperature)
1/2 dl sugar
5 tbsp cocoa powder
1 egg, beaten
about 150 gr graham cracker crumbs
1 dl finely chopped almonds
2,5 dl shredded coconut
 
113 gr butter (room temperature)
2 dl icing sugar
1/4 vanilla bean
1 egg yolk
2 tbsp + 2 tsp cream

100 gr chocolate
1 tbsp butter

baking dish 17x26 cm

Put the butter, sugar and cacao in a double boiler and let everything melt. Remove from heat, add the beaten egg, mixing constantly, return to the heat until it thickens, about 2 minutes. Add the crumbs, coconut and almond. Mix everything well and press into the baking dish. I also used plastic foil for my ceramic dish. Put in the fridge while you prepare the filling.

Beat butter and icing sugar until well blended, add the egg yolk, seeds of the vanilla bean and as much as milk as you need. You do not want the filling to be runny. Beat until you have light mixture. Spread over bottom layer and return to the fridge until you prepare the chocolate topping.

Melt butter and add chopped chocolate, whisk until everything is smooth and chocolate is melted. Let it cool but not get hard. If the chocolate is too hot it will melt the butter filling. When cool spread over the butter layer and return to the fridge.

Sunday, February 07, 2010

World Nutella Day

5th of February is World Nutella Day. I like Nutella, although these days it does not find the place on the breakfast table as much as it did when I was a child. These days I appreciate more discovering new ways of using it. At the Christmas market in 2008 I discovered crepes with Nutella and amaretto...wow!

And these oatmeal and coconut balls (chokladbollar) are kind of a new recipe. They are very Swedish but traditionally made with butter, here I replaced half of the butter with Nutella.

Oatmeal and coconut balls
makes about 30
100 gr butter (room temperature)
100 gr Nutella
1 dl sugar (I used muscovado)
1/2 vanilla bean
3 tbsp cold espresso
3 tbsp cocoa powder
5-6 dl rolled oats

1 dl shredded coconut (to roll the balls in)

Blend butter, Nutella and sugar until everything is smooth, fork works fine. Add the seeds of the vanilla bean, cocoa powder, oats and cold coffee. With your hand (or not) blend everything until well mixed, form balls and roll in the coconut. You can put them in the fridge for an hour or so, but they taste as good at the room temperature as well.

Sunday, January 17, 2010

Old-style Bavarian appelstrudel

I have become the biggest Strudel-fan ever. I love it. The dough is so fun to make, you can fill it with almost anything and it is always amazing. I found the recipe for this apple strudel at the website of the Bavarian TV. I was curious about it as brown butter and sour cream are used in the filling and the strudel is baked in vanilla-milk.

It is a wonderful recipe, this strudel is like an apple cake with soft and creamy filling. It tastes even better the next day!

Old-style Bavarian appelstrudel
serves 6
recipe from
Bavarian TV

3 Boskoop apples (about 600 gr)
50 gr butter
50 gr raisins
150 gr sour cream
1/2 dl sugar
1 tsp cassia cinnamon
1 dl + 2 tbsp milk
half a vanilla bean

2 dl strong flour (I used white spelt flour)
2 tbsp oil
pinch of salt
about 5 tbsp warm water

baking dish 17x26 cm (1,2l)

First make the strudel dough and let it rest for about one hour. In the meantime prepare the apple filling.

On medium heat melt the butter and let it get brown, it takes about 15 minutes. Set aside so that the brown milk solids settle on the bottom of the pan.
Mix the sugar and cinnamon in a small bowl. Scrape the vanilla bean seeds and add to the milk. Peel the apples, cut in quarters, core and slice in thin slices.

Stretch the strudel dough to a 65x45 cm, cut the thick edges so that you have a nice thin strudel sheet 60x40cm. Let it dry for about 10 minutes. In the mean time pour brown butter in a small bowl, try to leave as much as you can of the brown milk solids in the sauce pan. Brush the strudel dough with brown butter. Save a bit of butter for the baking dish and for brushing the strudel when rolled.

Heat oven to 200C. Cut the strudel sheet in half so that you have two 20x30 sheets. Spread the apples on the short side, over a bit less then half of the dough, leaving an edge all around. Sprinkle raisins over the apples and spread the sugar mixture all over the apples and over the empty part of the strudel sheet. Spread the sour cream over the apples. Fold in the edges and roll the strudel. As you roll keep on folding the edges over so that the filling does not escape.

Butter a bit the baking dish, put the two strudels inside and brush strudels with brown butter. Pour inside the vanilla milk and bake for about 50 minutes. Let it cool completely before serving. The best is to make it in the morning and serve in the afternoon.

Wednesday, December 23, 2009

Poppy seed strudel with cherries

I have been wanting to make poppy strudel since forever and when I saw this recipe in the food-magazine Essen und Trinken I knew the moment had come. I love poppy seed, taste is so special, so different, and oh so delicious. And poppy seed with sour-cherries just cannot be wrong.

To use poppy seed in baking is very Central and Eastern European thing. There are many different cakes, cookies and breads that are made with poppy seed, and luckily strudel is one of them as well.


This time I made strudel dough with spelt flour, and I was really surprised how well it worked. It was the best strudel dough I have ever made. In Germany there are three different types of spelt flour and I used the white one which in German holds the number 630. The number says that each 100 grams of this type of spelt flour contains 0,63 grams of minerals (i.e. good stuff).

Poppy seed strudel with cherries
adapted from Essen & Trinken
serves 10
200 gr ground poppy seeds
2 dl milk
7 tbsp sugar
zest of 1/2 lemon
1/2 dl raisins
3 tbsp dark rum
seeds of 1 vanilla pod
1/4 tsp cassia cinnamon
2 tbsp butter
2 eggs
about 3 tbsp bread crumbs

1 can of sour cherries
2 tbsp sugar
1 dl orange juice
1 tbsp cornstarch (more or less)

2,5 dl white spelt flour (or strong bread flour)
2,5 tbsp olive oil
1/4 tsp salt
about 7 tbsp warm water

80 gr melted butter for brushing the strudel dough

First make the strudel dough and let it rest for an hour. While the dough is resting start preparing the filling.

In a sauce pan heat the rum and raisins, pour over in a small bowl and set aside. Put the milk, sugar, lemon zest, vanilla, cinnamon and 2 tablespoons of butter in a pan and cook until it boils, add ground poppy seed and mix well. Add raisins with rum, blend well, take off the heat, cover with a lid and set aside. The mixture should be quite thick (but wet, not dry) as later eggs will be added.

In a small sauce pan melt 2 tablespoons of sugar until light golden, add the orange juice and cherries with their juice, and let everything boil. Dissolve cornstarch in a bit of cold water and add slowly to the cherries (mixing all the time) until you have a thick sauce. Depending on how much cherry juice there is you will maybe have to add more cornstarch. Drain the cherries from the sauce and set both aside.

Stretch the strudel dough, and cut the edges so that you have 70x50 cm sheet. Let it dry for about 10 - 15 minutes and then brush with melted butter (a bit more than half of the melted butter). Preheat the oven, 200 C.

Lightly beat the eggs and add to the poppy seed, mix well. Spoon the poppy seed paste over a third of the stretched dough (40x25 cm), leaving a 5 cm edge on the three sides.

Now carefully with a help of a spoon spread the poppy seed paste evenly and put the cherries on the top.


Sprinkle the bread crumbs over the whole strudel dough, filling and the part without the filling. Fold in the sides (only the sides around the filling) and start rolling the strudel.
As you roll keep on folding in dough sides over the strudel and push the ends inwards when the strudel wants to get out of the path.

Brush the strudel with melted butter and with the help of the cloth roll over the strudel on a baking sheet. Now brush the other side with the melted butter, use all of the butter that is left, strudel loves the butter. If you have some butter left over brush the strudel couple of times during the baking. Strudel really loves the butter.

Bake for about 40 minutes.When done let it cool, then cut and serve with the cherry sauce.

Saturday, October 31, 2009

Sweet pumpkin strudel

Last winter I made savory pumpkin strudel so this winter it was turn to make sweet pumpkin strudel.
Hokkaido is the pumpkin in question, no surprise here!

And as this pumpkin is delicious as it is I thought a bit of cinnamon, ground hazelnuts and sugar would be more than enough to add to the filling.

So the only thing left to "play" with was the strudel dough. I decided to add the spices I usually use when making Swedish gingerbread cookies (cinnamon, ginger, cloves and cardamom) in the dough.
I just loved the idea of pumpkin being enclosed in dough that tastes like gingerbread. And as I have never seen a strudel with other than plane-wheat strudel dough I liked the idea even more.

However I was not sure if the gluten would like this spice addition, and if it would be possible to stretch the dough thinly. But it worked! I stretched it very thin without any problems. And the strudel, that stands for all the great things about the fall and winter, turned out fantastic!

Sweet pumpkin strudel

serves 6
450 gr Hokkaido pumpkin
1 dl toasted and ground hazelnuts
1/2 dl sugar
1/2 tsp ground cassia cinnamon

1,5 dl bread flour
1/2 tsp ground cassia cinnamon
1/4 tsp ground cardamon
1/4 tsp ground cloves
1/2 tsp ground ginger
pinch of salt
1 tbsp oil
4 tbsp warm water

2 tbsp melted butter for brushing the dough

Make the strudel dough and let it rest for an hour. When 30 minutes are left start preparing the filling. Wash the pumpkin, cut in half and clean from seeds. Cut each half in thicker slices and then cut each slices thinly. Add hazelnuts, sugar and cinnamon.

Preheat the oven 175 C. Stretch the strudel dough and brush with butter. Spread the pumpkin filling over half of the strudel sheet, leaving 5 cm around the edges. Fold in the edges and with help of the cloth roll the strudel.

Brush with butter and bake for about 50 minutes. This strudel tastes even better the next day!

Sunday, October 25, 2009

Cooked quince and manchego

Small deviation from my Hokkaido-theme. I wrote about manchego cheese and quince paste tapas from Spain. The tapas was delicious, but I wanted to try serving the manchego cheese with slices of cooked quince. So as soon as the first quince were on the market I did it.

I cooked one quince and when it was cold I cut it in thin slices and served with manchego. Loved it! Quince slices are less sweeter (I did not use much sugar), less dense and much lighter in taste than the quince paste, so the perfect companion is manchego cheese that is mild taste, i.e. not aged very long.

Cooked quince
1 quince
1 dl sugar
5 dl water
pinch of salt

Put sugar, water and salt in a sauce pan and let it simmer until sugar is melted. In the mean time peel, core and cut quince in 8 thick slices. Put the slices in the sugar water, cover and cook on low heat until red, about 2 hours.

Pour the quince with the syrup in small bowl, make sure quince is covered with the syrup and let it cool completely. When cold cut in thin slices and serve on the top of manchego cheese. If you like drizzle some syrup over.

The syrup and left over quince can be added to milk rice, porridge...

Tuesday, October 20, 2009

Pumpkin custard pudding

Yes, Hokkaido is my latest obsession. Last week I had Hokkaido, either at home or at work, every single day. It was prepared differently every time and I am still not tired of it.

I got the idea to make this custard after eating pumpkin pannacotta. I loved it, but I thought custard pumpkin could be easier, faster to make and probably more healthy alternative.

My idea was very simple, to add steamed and mashed Hokkaido pumpkin to vanilla custard. As easy as that and the result was super delicious.

Pumpkin custard pudding
serves 2
3 dl + 1 dl milk (or coconut milk)
half vanilla bean
1/2 tsp ground cassia cinnamon
3 tbsp cornstarch
3 tbsp sugar
200 gr Hokkaido pumpkin

Cut Hokkaido in cubes and steam for about 20 minutes. Set 4 pumpkin cubes aside for decoration, and mash the rest of the pumpkin with a fork. If you prefer smooth custard pass the mashed pumpkins through a strainer. OR if you have a blender just blend the pumpkin until smooth.

In a small bowl mix 1 dl milk, cinnamon, cornstarch and sugar. Pour the rest of the milk in a sauce pan, add scraped vanilla seeds and the pod, let everything boil. When it boils, take out the vanilla pod and add mashed pumpkin. Mix with a whisk, take of the cooker and turn of the cooker.
Add the cornstarch mixture and mix with a whisk, return the the cooker until the custard thickens, a minute or so, it should not boil. Pour into 2 bowls and let cool.


When cold decorate with steamed pumpkin cubes and sprinkle with cinnamon.

Sunday, October 11, 2009

Hokkaido pumpkin

The fall is here and so are the pumpkins. I love pumpkins, and this fall Hokkaido pumpkin is my favourite pumpkin. Hokkaido is amazing, no matter how you prepare it it turns out delicious.

It is Japanese and it is named after Hokkaido-island in Japan. I have never been to Japan but friends of ours who have say that Hokkaido island is really beautiful and its big agricultural area makes it quite different to the rest of Japan. Sounds very exotic to me!
My cinnamon buns with Hokkaido are super buns! But the most common way I eat Hokkaido is either oven-roasted or steamed, and seasoned with some honey and cinnamon. Both ways of preparing are equally delicious, but sometimes I feel for steamed and sometimes for oven-roasted.


Oven roasting takes some time but it brings out the sweetness and the flavour of the pumpkin. I cut the pumpkin in cubes and roast on 180 degrees for about 45 minutes. Nothing else needs to be added. And when is done I sprinkle some cinnamon and drizzle some honey over.

Steamed Hokkaido is more light in taste and the texture is almost like a custard. Cut it in cubes and steam for about 20 minutes. When done season with cinnamon and honey.

Sunday, October 04, 2009

Cinnamon buns with pumpkin

Today is the "Cinnamon bun Day" in Sweden. Yes, there is a day in Sweden when you celebrate the cinnamon bun, i.e. bake/buy and eat/give away as much as you can.
Swedish cinnamon buns are made of sweet yeast dough that is filled with cinnamon, butter, sugar and sprinkled with nib sugar.

But as the pumpkin season is here I decided to twist the recipe just a tiny bit. I added steamed Hokkaido pumpkin to the filling. It worked really excellent, the buns were more than delicious!

This time I used dry organic yeast Bio Vegan and it worked excellent. I also used bread flour so maybe that was the reason why it worked better this time.

Cinnamon buns with pumpkin 
about 20 buns
80 gr butter
1,5 dl milk
1 tsp ground cardamom
1 egg, beaten
about 6 dl bread flour
6 tbsp sugar
9 gr dry organic yeast
1/4 tsp salt

250 gr steamed Hokkaido pumpkin
50 gr butter, room temperature
4 tbsp sugar
1,5 tsp ground Cassia cinnamon

1 egg

pinch of salt
100 gr almond flakes

Melt the butter, add the milk and cardamom. The mixture should me lukewarm. You do not want it to be hot as it will kill the yeast. Pour the warm liquid in a big bowl, add flour, beaten egg, sugar, yeast and blend well. Add salt and knead the dough until you have smooth, soft and not sticky dough. By hand it takes about 10 minutes. Cover and let rise in a warm place for about 1 hour.

Cut the pumpkin in cubes. You do not have to peal Hokkaido pumpkin, the skin is edible. Steam for about 25 minutes. When done let it cool a bit and then mash with a fork. Add butter, sugar and cinnamon, blend well.

Roll out dough to a 30x40 cm rectangle. Spread the pumpkin filling evenly and starting at long side (40 cm) roll up the dough. Cut buns, about 2 cm wide and put them on a baking sheet. Cover with a tea towel and let rise for about 45 minutes.

Preheat oven to 225 C. Beat the egg together with salt and brush the buns. Sprinkle some almond flakes on the top and bake for about 12-15 minutes. These buns are best eaten the same day they are baked.

Sunday, July 19, 2009

Cherries

I love cherries. They are one of my favourite fruits. As a kid I have spent many summers sitting up in the cherry tree, picking and eating. The coolest thing was to eat the cherry-pit as well...not so cool anymore.
Cherries can be sweet (left) or sour (right) in taste, and there are many variates of each sort.

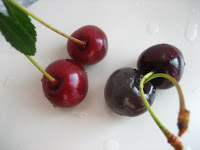
Sweet cherries are meaty in texture, they are less juicy than the sour cherries and it is easy to remove the pit. It was these cherries I was eating up in the tree and even today I only eat them fresh, no baking here.
Sour cherries on the other hand are very juicy, dark red and it is bit harder to remove the pit. They are really sour and flavourful so these are the cherries for cooking and baking.


And when it come to the baking, cherries and almonds are the perfect match. So I decided to make my favourite almond cake, Spanish cake called Tarta de Santiago. It is made of equal parts of eggs, sugar, almond flour and flavouring, very simple and very delicious.
I also wanted to use strudel dough (my latest obsession) and so was this sour cherry cake born.


Sour cherry cake
serves 6
3 eggs
200 gr sugar ( I used mixture of muscovado and cane sugar)
200 gr ground almonds (I used toasted almonds)
200 gr sour cherries
1,5 tbsp amaretto liqueur

2 dl bread flour
pinch of salt
1,5 tbsp oil
about 5 tbsp warm water

2 tbsp melted butter
2 tbsp sugar (from those 200 gr above)
2 tbsp ground almonds (from those 200 gr above)

baking dish 25x15 cm (1,3l)

Make the strudel dough , divide in 5 equal parts and let it rest for one hour. In the mean time pit the cherries. When the strudel dough has rested stretch each part individually. Brush the baking dish with melted butter and cover the bottom with one strudel sheet. Brush the sheet with melted butter and sprinkle some of the sugar and ground almonds over it.
Repeat until you have used all the strudel sheets. Do not sprinkle any sugar and almonds on the last sheet.
Preheat the oven, 180C. Beat eggs and sugar until fluffy and light in colour. Add amaretto and ground almonds. Blend carefully until everything is incorporated. Pour over the strudel layers, spread cherries over the almond filling and bake for about 30 minutes. Cute when cold. It tastes even better the next day.

Sunday, July 12, 2009

Mexican chocolate pudding

When I saw the recipe for Mexican chocolate pudding in Gourmet I had to make it. I love everything about Mexican chocolate, it is too perfect. And this pudding recipe is using almond milk so I was very curious about how it will influence the flavour. And what can I say, excellent influence.

I have changed the recipe just a bit, I used muscovado sugar and less of it, I added more cornstarch and left out the butter completely. I also cooked the pudding the way I always do.

One important thing when it comes to the cinnamon. There are two different cinnamon types, Ceylon and Cassia. I learned this when I went to Mexico for the first time. In Mexico Ceylon cinnamon (right) is used, but in Sweden Cassia (left) is used.


The taste is really different so when you make Swedish cinnamon buns you have to use Cassia and when you make Mexican chocolate you have to use Ceylon. Otherwise they don´t taste as they should.

Mexican chocolate pudding
adapted from Gourmet
serves 2

4+1 dl almond milk
3,5 tbsp cornstarch
3 tbsp muscovado sugar
4 tbsp cocoa powder (I used one with 10-12% cocoa butter)
1/2 tsp Ceylon cinnamon powder
1/8 tsp salt
1/2 vanilla bean


Put 4 dl almond milk in a saucepan. Scrape the vanilla bean and add to the milk together with the pod. Put the milk to boil.
In a small bowl mix all dry ingredients, slowly add 1 dl cold almond milk, whisk until everything is smooth. When the almond milk is boiling, take out vanilla pod and remove from heat. Add the cornstarch mixture, whisking all the time. Put back on the heat and and let it boil on low heat until it thickens, couple of minutes. Do not whisk that much as the cornstarch might go thin. Divide between two bowls and let chill.

Monday, June 08, 2009

Sweet buckwheat dumplings

I wrote about semolina soup dumplings before and now it was time to test the sweet version of these dumplings. They are made of wheat semolina but I bought some buckwheat semolina and decided to use it instead.

Last time I made soup dumplings by soaking semolina in butter and egg, but sweet dumplings are made by cooking semolina in milk and adding egg when cooled. Just like when cooking semolina pudding, except that the mixture has to be very thick so that the dumplings can hold their shape.

The sweet buckwheat dumplings turned out delicious! I love how the buckwheat flavour comes forward, and the breadcrumbs and strawberries make a perfect match.

Sweet buckwheat dumplings
serves 2
1 dl buckwheat semolina
1 dl milk
2 tbsp butter
1/2 vanilla bean
zest of half of lemon
1 small egg

2 tbsp butter
6 tbsp breadcrumbs
2 tbsp muscovado sugar

strawberries to serve with

Pour the milk in a sauce pan, add butter and scraped vanilla seeds, the vanilla pod and the lemon zest. Bring everything to boil, take out the vanilla pod, add semolina, stir and cook for about 2 minutes until you have a very thick mixture. It should be so thick that it holds shape firmly. Let cool.

Heat the butter in pan, add breadcrumbs and cook on low temperature until the breadcrumbs get some colour. Add muscovado sugar and let everything sit in a pan.

When the semolina is cold, add egg and blend well. You should have somewhat softer dough but it should still hold its shape well. Divide the dough in 4 pieces. With wet hands form round balls. Bring a sauce pan with water to simmer, shape the dumplings again if they have become bit flatter on one side, put into the water, cover and let simmer for 10 minutes.


When dumplings are cooked, drain well and add to the pan with breadcrumbs. Shake the pan until the dumplings are covered with the breadcrumbs. Serve with sliced strawberries.