I am not sure if 'catching up' is the right way to say it but there will be some blogging around here. After 3 years in Canada we now live in Denmark and I really want to start writing before I start forgetting, so that one day when I do forget I can return to this blog and read where did we use to live and eat :-). I have tons to write about and am looking forward sharing it with you!
Tuesday, March 01, 2016


Saturday, October 01, 2011
Maple sugar
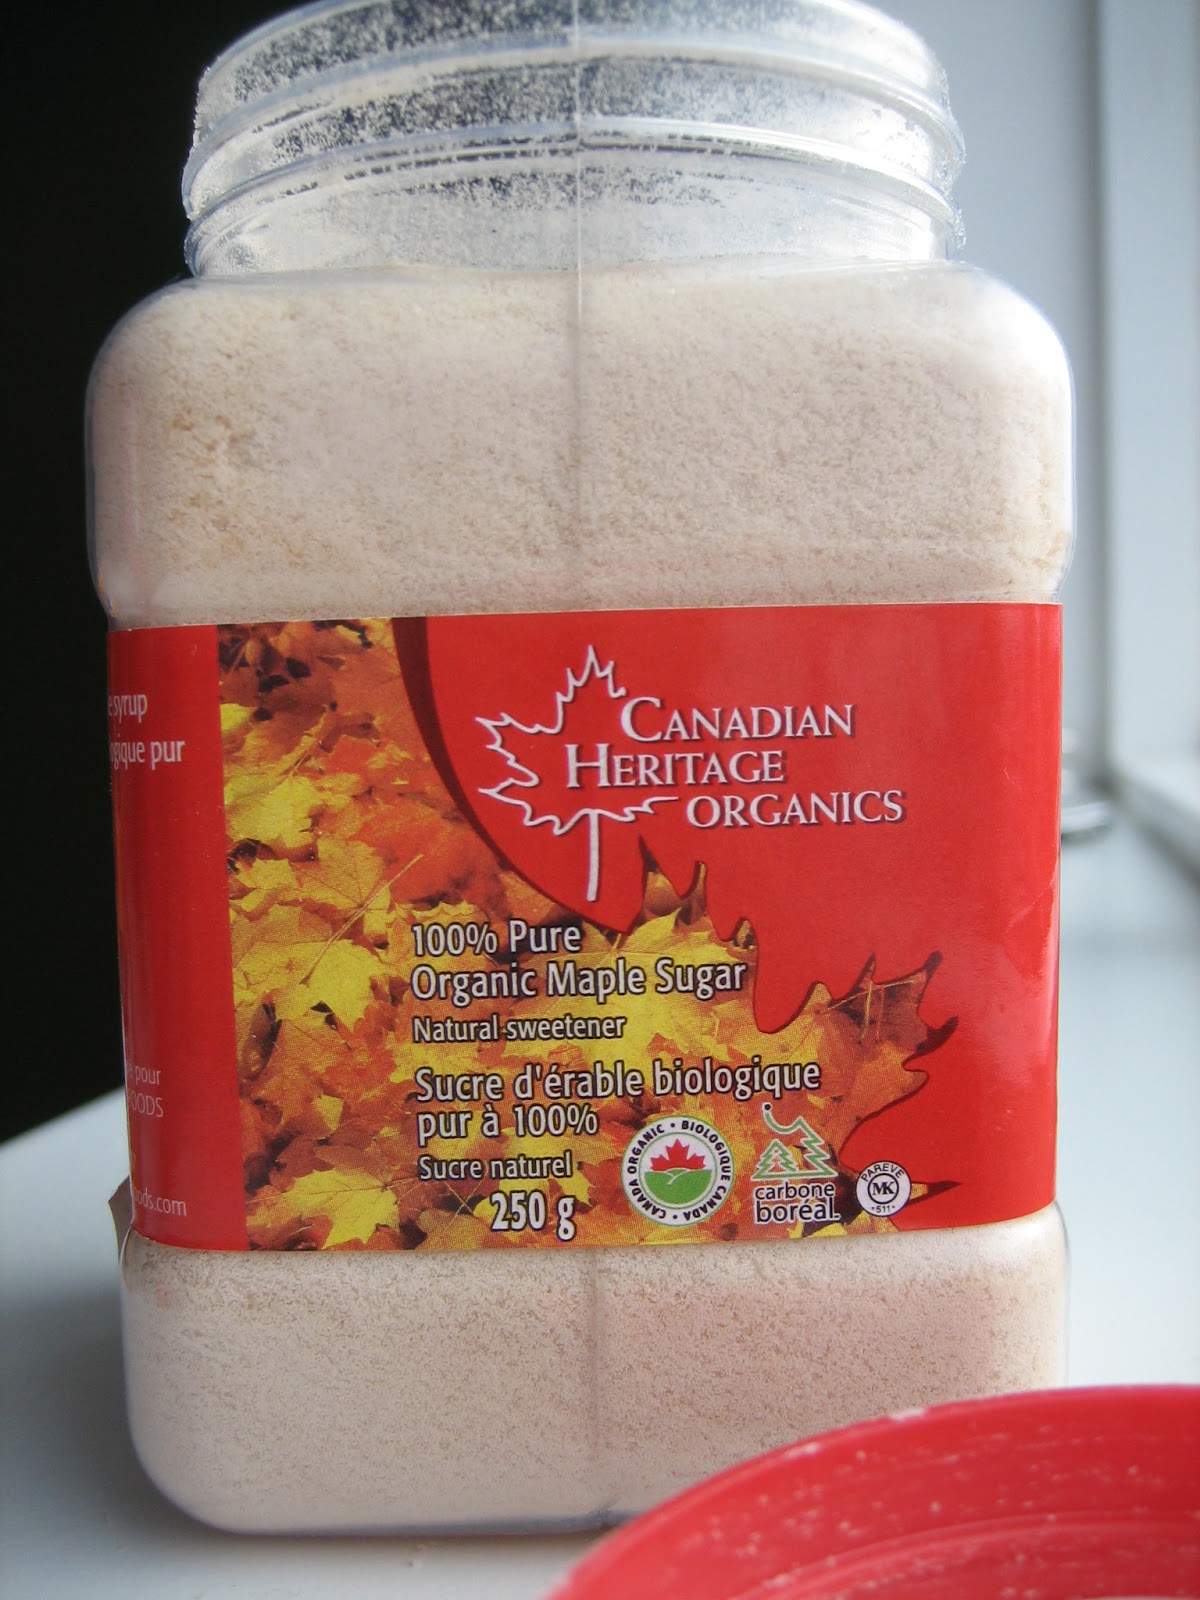
When boiling maple sap beyond the maple syrup point, almost all water will evaporate. What is left is a solid mass that is ground into sugar when cool. Unfortunately I have not been able to see the process but the price tag (double of maple syrup) tells me that there must be more work and less water involved. It is a delicious sugar worth special occasions.

Thursday, September 01, 2011
Maple syrup mousse
If you can, use dark maple syrup to make this mousse, maple flavour will be stronger. I also used less maple syrup than the original recipe as I prefer the mousse less sweet. This time I did not use almonds and soaked raisins as the recipe indicates but I can definitely see how they would be a great addition, so next time I will. Egg yolks in this mousse are not cooked, but if you need them to be cooked use pasteurized eggs.

Maple syrup mousse
recipe adapted from here
2,5 sheets gelatin
170 gr maple syrup
3 large egg yolks
450 gr cream
Soak the gelatin sheets in cold water for 10 minutes. Heat the maple syrup in a saucepan and just before it comes to boil remove from heat. Squeeze water from gelatin, add to maple syrup and whisk.
Whip the egg yolks until light and fluffy. In a slowly stream add one third of hot maple syrup. Whisk well and then add rest of the maple syrup. Transfer to a large bowl and put into fridge. Stir frequently until thickened, like curd thickened. Can take up to 1 hour.
Beat the cream until soft peaks and gently fold into the maple mixture. Pour into bowls and refrigerate for about 2 hours.
170 gr maple syrup
3 large egg yolks
450 gr cream
Soak the gelatin sheets in cold water for 10 minutes. Heat the maple syrup in a saucepan and just before it comes to boil remove from heat. Squeeze water from gelatin, add to maple syrup and whisk.
Whip the egg yolks until light and fluffy. In a slowly stream add one third of hot maple syrup. Whisk well and then add rest of the maple syrup. Transfer to a large bowl and put into fridge. Stir frequently until thickened, like curd thickened. Can take up to 1 hour.
Beat the cream until soft peaks and gently fold into the maple mixture. Pour into bowls and refrigerate for about 2 hours.
Monday, August 01, 2011
Beaver Tails in Ottawa


Beavers Tail is a fried dough pastry that resembles beaver's tail. It comes with large variety of toppings, one on the left is with apple and one on the right is with maple syrup and maple butter. Very delicious!
Friday, July 01, 2011
Butter tarts
Butter tart is a true Canadian dessert. There are many different variations of it, runny, gooey, firm, with raisins, without raisins, with pecan, without pecans, chocolate...just name it. And there are probably as many recipes as there are Canadian grandmothers. Butter tarts are very sweet and when made with pecans they remind of baklava. Like the recipe that follows. These are also gooey, which is my favorite butter tart consistency.

Butter tarts
recipe adapted from here
makes 6
70 g flour
15 g ground toasted pecans
58 g butter
pinch of salt
about 1 tbsp cold water
Cut the butter into small cubes, add
flour, pecans, salt and with a pastry blender or food processor blend until you have
grainy texture with some pea-size pieces of butter. Slowly add water
and blend until everything comes together. Wrap and put in the fridge
for at least 1 hour.
When the dough has chilled roll it out, cut out, line 6 muffin cups (or similar) and put in the fridge for at least 30 minutes. I use silicone molds (oval, each holding 100 gr water) as it is very easy to take out the tarts in case the filling leaks, which it almost always does.
Heat over to 200 C and blind bake the tart shells for about 15 min. Remove the beans and bake for another 10 min or until golden.
In the meantime make the filling.
40 g brown sugar
40 g maple syrup
40 g golden syrup
30 g melted butter
30 g egg
1/4 tsp salt
1/2 tsp vinegar
about 10 toasted pecan halves
Whisk all above ingredients except for pecans. Remove the shells from the oven and rise oven temperature to 230 C. Divide pecans over the shells and pour the filling into each shell. Bake tarts for about 10-15 minutes.
When the dough has chilled roll it out, cut out, line 6 muffin cups (or similar) and put in the fridge for at least 30 minutes. I use silicone molds (oval, each holding 100 gr water) as it is very easy to take out the tarts in case the filling leaks, which it almost always does.
Heat over to 200 C and blind bake the tart shells for about 15 min. Remove the beans and bake for another 10 min or until golden.
In the meantime make the filling.
40 g brown sugar
40 g maple syrup
40 g golden syrup
30 g melted butter
30 g egg
1/4 tsp salt
1/2 tsp vinegar
about 10 toasted pecan halves
Whisk all above ingredients except for pecans. Remove the shells from the oven and rise oven temperature to 230 C. Divide pecans over the shells and pour the filling into each shell. Bake tarts for about 10-15 minutes.
Wednesday, June 01, 2011
Maple butter
Despite the name the maple butter does not contain any dairy butter. It is made of pure maple syrup that has been boiled to a certain temperature and then stirred. It is very very sweet and used as spread on toast, scones or glaze on cakes. I use it sometimes instead of honey. Tastes wonderful with sourdough bread.


Sunday, May 01, 2011
Maple syrup tart
The maple syrup tart should be as famous as the chocolate tart. This Québécois recipe proves it, c'est magnifique.
The crust is flaky, very buttery and not sweet at all. Do not be tempted to use your favourite crust recipe. Use this one. It is perfect pair for the sweet, sweet maple filling. Thin slices of this tart will go long way and it tastes even better the next day. If you have dark maple syrup this a perfect occasion to use it.

Maple syrup tart
Recipe from here
112 gr cold butter
137 gr flour
about 35 gr cold water
pinch of salt
Cut the butter into small cubes, add flour and with a pastry blender or food processor blend until you have grainy texture with tiny (about 3 mm) pieces of butter. Slowly add water and blend until everything comes together. Wrap and put in the fridge for 2 hours or more.
200 gr maple syrup
60 gr cream
50 gr butter
1/2 tbsp flour
80 gr eggs (about 2 small)
In a saucepan bring maple syrup and cream to boil. Remove from heat, add butter and flour and stir everything together. Set aside to cool.
Preheat the oven to 190C. Roll the dough and line a 20 cm tart tin, the dough should come up the side by about 3 cm. Keep the left over dough as you might need it to fill any cracks in the baked shell. But keep it outside the fridge as it needs to be soft. Blind bake for about 20 min, then remove the beans and parchment paper and bake for another 15-20 min until golden.
Because of the high amount of butter, this crust is going to shrink by 1/2 cm, which is totally ok.
Because of the high amount of butter, this crust is going to shrink by 1/2 cm, which is totally ok.
Add eggs to the cooled maple syrup, mix well. If the shell has any big visible cracks cover them with the left over dough, pressing very lightly. Pour the maple filling into the hot tart shell as soon as you can. If you pour it into a cool crust the filling will find all tiny cracks to escape through. Hot tart shell makes sure that the filling cooks as soon as you pour it in. Decrease oven temperature to 150C and bake the tart for another 25 - 30 min.Voilà!
Friday, April 01, 2011
Dark maple syrup
In Canada maple syrup is sold from light in colour to very dark in colour. The darker the maple syrup is the more intense the maple flavour will be. The colour depends on the time in the season the maple sap was collected, the later in the season the darker the maple syrup.


Tuesday, March 01, 2011

Tuesday, February 15, 2011
How is Maple Syrup made?
We had an amazing opportunity to visit a sugarbush farm in Ontario, Canada and saw the whole process of making maple syrup.

Buckets are hanging on the trees and collecting the sap that is literally dripping from small spouts that have been bored in the trees. Big maple bush farms have hoses that are connecting all the trees.
On a good day one tree can give about 12 litres of maple sap. The season runs usually between mid March until end of April, depending on the outside temperature.

The temperature must be minus during the night and plus during the day for the sap to flow. At some point starch in the trunk converts into sugar and when the temperature is plus degrees during the day the sugary sap goes all the way up in the trunk, and when the temperature drops during the night the sap goes all the way down and is caught by the spouts.

The temperature must be minus during the night and plus during the day for the sap to flow. At some point starch in the trunk converts into sugar and when the temperature is plus degrees during the day the sugary sap goes all the way up in the trunk, and when the temperature drops during the night the sap goes all the way down and is caught by the spouts.


The sugar level is measured with an aerometer and the sap contains about 2 % sugar, no more. Basically most of it is water and that is why it does not have the nice colour the maple syrup has. We tasted it and it has absolutely no taste.
After many many hours of boiling in special machines the most of the water evaporates and the end product is left with 67 % of sugar and it looks and tastes like the maple syrup we know.


Before visiting the maple bush I always thought that the maple syrup comes out of the tree looking as in the supermarket :-). But there is so much patience and labour behind the whole process. Thank you Canadian First Nation people for figuring out how to do this.
Saturday, January 15, 2011
Obatzda - Bavarian cheese-spread
 Obatzda is Bavarian cheese-spread that can be found on the menu in every beer-garden. Every beer-garden has its own spice mixture that is added to the cheese. Some of the spices often used are sweet paprika, caraway, onions and beer. There are probably as many variations as there are beer-gardens.
Obatzda
original recipe in German
250 gr Camembert (at room temperature)
1 tbsp soft butter
1 small finely chopped onion
salt & pepper
some sweet paprika
some ground caraway seeds
4 tbsp wheat beer (Weißbier)
rye bread
Mix well Camembert and butter. Add all the spices and as much beer as you need to get a creamy spread. Let it sit for at least an hour so that all flavours develop. Obatzda should be eaten on the same day it is made. If you plan to serve it the next day cook the onion in some oil until soft, cool and add to the mixture. Obatzda is best eaten on a slice of rye bread.
Wednesday, December 15, 2010
New chocolate from Yogi Tea!


Yogi Tea has started making chocolate! I have tried their Cinnamon Spice and Mexican Spice chocolates and they are so good. Although Cinnamon Spice was tasting more like the traditional Mexican drinking chocolate than the Mexican Spice chocolate it self. But I did enjoy both very much so!
Monday, November 15, 2010
Mole
Mole is a traditional Mexican sauce, usually made with different chili peppers and many other spices which all give mole its amazing flavour. I love it.
I have been intimidated to make mole for a very long time. Mostly because it was a completely new subject to me, I was not familiar with preparing anything like mole. Even a Mexican person will tell you how complicated it is to make it.
Then one day I met someone who actually had made mole from scratch. And I was told that as long as you can find all different chili peppers (quite difficult when not living in Mexico) it is not hard at all. But that it does take time to make it.
So I gave it a shot. And I am glad I did.
Then one day I met someone who actually had made mole from scratch. And I was told that as long as you can find all different chili peppers (quite difficult when not living in Mexico) it is not hard at all. But that it does take time to make it.
So I gave it a shot. And I am glad I did.

So I am reconfirming, it is not hard at all. It just takes time, you will need about good 3 hours. I usually roast and fry all the ingredients the night before and the next day I puree and cook.
I use this recipe. The things I have changed from the original recipe are:
I use this recipe. The things I have changed from the original recipe are:
- I roast chili peppers and tortilla in a dry cast iron skillet, no oil.
- For frying the rest of the ingredients I use grape-seed oil and a bit less than a half a cup.
- I do not use the extra sugar as Mexican chocolate gives enough sweetness.
- I cook mole until is quite thick (see picture) because most of it goes to the freezer. The recipe really gives a lot and it works excellent to freeze it. When you are ready to have it just put it in the fridge the night before and then add to some hot chicken stock.
 Now back to the chili peppers. In Mexico there is a huge variety of dried chili peppers and when they are dried they get a completely new name. For example chili chipotle is a dried version of a fresh jalapeño chili.
 Here you can see all four chili peppers used in the recipe, from the left: mulato, ancho, pasilla and chipotle meco.
Friday, October 15, 2010
Mexican chickpea cake
 I love chickpeas, in any form. So when I saw a recipe for a cake with chickpeas I had to make it. And I was not disappointed. With a touch of cinnamon and small amount of sugar (I used only 3 tbsp) it was an exceptional cake.
The original recipe calls for nata (skin from boiled milk), which I did not have, or evaporated milk. Since I do not use canned evaporated milk (no Nestle allowed in this kitchen) I used cream instead.
Torta de garbanzo
recipe from Cooking in Mexico
2 cups cooked chickpeas (I used one 540 ml can)
 3 tbsp cane sugar
1/2 tsp cinnamon
1/2 cup cream
1 egg
1/2 oz almonds ( I used ground almonds)
1/4 cup raisins
extra cinnamon to sprinkle the cake
Preheat oven to 175 C. Butter a 20 cm round cake dish, line the bottom with parchment paper.
Put all ingredients, except for the raisins, in a blender and blend until smooth. Add raisins and pour into the cake dish. Sprinkle with cinnamon and bake for about 30 minutes. Cool for couple of hours before cutting.
2 cups cooked chickpeas (I used one 540 ml can)
 3 tbsp cane sugar
1/2 tsp cinnamon
1/2 cup cream
1 egg
1/2 oz almonds ( I used ground almonds)
1/4 cup raisins
extra cinnamon to sprinkle the cake
Preheat oven to 175 C. Butter a 20 cm round cake dish, line the bottom with parchment paper.
Put all ingredients, except for the raisins, in a blender and blend until smooth. Add raisins and pour into the cake dish. Sprinkle with cinnamon and bake for about 30 minutes. Cool for couple of hours before cutting.
Thursday, September 16, 2010


Sunday, August 15, 2010
Black Forest cake
Black Forest cake, or as it is called in German Schwarzwälder Kirschtorte, is one of my favorite cakes. Chocolate, cherries, cream and kirsch are meant to be together! And the kirsch is a must, without it you cannot really call it a Black Forest cake...and the more the better.


Black Forest cake
recipe from Trachten Winkler
chocolate-almond cake
200 g butter
200 g sugar
some vanilla
8 eggs
200 g cake flour
200 g ground almonds
150 g grated dark chocolate
zest of one lemon
2 tsp baking powder
short-crust
100 g powder sugar
200 g butter
1 egg
zest of one lemon and some juice
300 g flour
filling
50 g cherry marmalade
9 tablespoons kirsch (more or less)
8 dl whipping cream
150 g powder sugar
cherry filling
about 500 g fresh cherries or from a jar
about 150 g sugar
about 50 g corn starch
decoration
6 dl whipping cream
100 g powder sugar
150 g dark chocolate, grated
16 fresh cherries
If you can, make the chocolate-almond cake a day before because the next day it is easier to slices it in three layers.
Preheat oven to 180 C. Line a 26 cm round cake pan with parchment paper on the bottom. In a small bowl put the flour, ground almonds, grated chocolate, lemon zest and baking powder.
In another bowl beat the room-temperature butter, sugar and vanilla until creamy and fluffy. Add room-temperature eggs one buy one until well incorporated. Add the flour mixture and with a spatula slowly mix until well blended. If you fell the mixture is too thick add some milk. Pour in the cake pan and bake for about 40 minutes. Check with a cake tester. Let the cake cool completely. If you are baking the day before, after it has cooled down wrap it in the plastic foil and refrigerate.
Now make the short crust. Beat the sugar and butter, add the egg. When fluffy add flour, lemon juice and zest. Roll out, about 2 cm thick and cut a 26 cm circle. Bake at 180 C degrees about 15 minutes.
If you use fresh pitted cherries for the cherry filling put them in a sauce pan together with the sugar. Cook on a low heat until they have softened and released the juice. In a small cup mix the corn starch and some water, add to the cherries and cook shortly until thick. Let cool.
If you use jar cherries, drain them from the juice. Put the juice in a sauce pan, add sugar and let it boil. Mix the corn starch with some cold water and when the cherry juice in boiling add it. Cook shortly until thick. Take of the heat and add cherries. Let cool.
Assembling the cake
Cut the chocolate almond cake in three layers. Whip the cream and powder sugar for the filling. Spread the cherry marmalade over the short crust.

Top with one almond-chocolate layer and soak it with 3 tablespoons of kirsch. Spread two rings of cherry filling over the layer. Spread three rings of whipped cream around.


Cover with the second layer of almond-chocolate cake. Soak with 3 tablespoons of kirsch. Spread whipped cream.

Top with the last layer of almond-chocolate cake, soak with 3 tablespoons of kirsch. Refrigerate the cake for couple of hours or overnight.

Whip the cream and powder sugar for the decoration.Cover the whole cake with whipped cream. Mark the 16 slices with a knife and with a help of pastry bag pipe 16 whipped cream roses. Grate the chocolate and spread on the top and the sides. Top each cream rose with a cherry. Enjoy!
If you use fresh pitted cherries for the cherry filling put them in a sauce pan together with the sugar. Cook on a low heat until they have softened and released the juice. In a small cup mix the corn starch and some water, add to the cherries and cook shortly until thick. Let cool.
If you use jar cherries, drain them from the juice. Put the juice in a sauce pan, add sugar and let it boil. Mix the corn starch with some cold water and when the cherry juice in boiling add it. Cook shortly until thick. Take of the heat and add cherries. Let cool.
Assembling the cake
Cut the chocolate almond cake in three layers. Whip the cream and powder sugar for the filling. Spread the cherry marmalade over the short crust.

Top with one almond-chocolate layer and soak it with 3 tablespoons of kirsch. Spread two rings of cherry filling over the layer. Spread three rings of whipped cream around.


Cover with the second layer of almond-chocolate cake. Soak with 3 tablespoons of kirsch. Spread whipped cream.


Top with the last layer of almond-chocolate cake, soak with 3 tablespoons of kirsch. Refrigerate the cake for couple of hours or overnight.

Whip the cream and powder sugar for the decoration.Cover the whole cake with whipped cream. Mark the 16 slices with a knife and with a help of pastry bag pipe 16 whipped cream roses. Grate the chocolate and spread on the top and the sides. Top each cream rose with a cherry. Enjoy!
Thursday, July 15, 2010
Champurrado
Champurrado is another Mexican drink made with cacao beans that is really amazing. The difference from the Mexican hot chocolate is that ground corn is used to thicken it up (the same corn flour used to make tortillas) and it is not as sweet as the hot chocolate. If you have Mexican chocolate discs you can easily make champurrado by adding some corn flour until you have slightly thick chocolate.
However, last time we were in Mexico I picked up a bag of champurrado mix by a brand Kekua. The ingredients are: corn, sugar, cacao, cinnamon and soy lecithin. You add 3 tbsp of this mix to a cup of milk or water, boil it, froth it, done.


I really like this mix, it is perfectly sweet and thick, they just could have added a bit more of the cinnamon.

Wednesday, June 16, 2010
Lentils with spätzle

Lentils with spätzle is an old traditional Swabian dish (south west Germany) and it has become my favorite lentil recipe. Well, not exactly the traditional dish but rather an updated version of it.
I found the recipe at the website of the organic food company Rapunzel and it is somewhat modernized version of the traditional dish. These lentils have a touch of apple juice, apple balsamic, cloves, cinnamon and there are no sausages on the side like in the traditional version. And it is not only delicious but it is also very easy to make.
Just make sure to use cloudy apple juice without any additives or sugar, i.e. pure unfiltered apple juice. I use this one.


Lentils with spätzle
adapted from Rapunzel
serves 2
400 gr cooked brown lentils
30 gr butter
20 gr flour
3 dl cold water
3 tbsp cloudy apple juice
2 tbsp finely diced celery
2 tbsp finely diced carrot
2 tbsp finely diced potato
1 tbsp apple balsamic ( I use regular apple vinegar)
1 bay leaf
a tiny tiny pinch ground cloves
a tiny tiny pinch ground cassia cinnamon
250g flour ( I use spelt)
3 eggs
1/2 tsp salt
about 1,5 dl water
In a saucepan melt the butter and add the flour. Cook on a medium heat until the flour gets light brown, takes a bit more than 5 minutes. Add about 3 dl cold water and whisk until nicely blended with the roux. Add the apple juice, all diced vegetables and spices. Cook until the vegetables are done.


If you are making spätzle start with the dough. Mix flour, salt and eggs. Add slowly water until you have dough that is not too much runny nor too much thick. When you put the dough in the spatzle maker it should form drops but not drop straight through. Cook the spatzle in plenty of water and drain.
When vegetables are done add apple balsamic (or vinegar) and cooked lentils. Let it boil and serve with spätzle.
Wednesday, May 12, 2010
Favorite bakery in Munich
Hofpfisterei is my favourite bakery here in Munich. They make amazing breads, sweet breads, danishes, cookies...just name it. All bread is organic sourdough and they have so many variates. My favourite bread is called '1331', a blend of rye and wheat. But to be honest I love them all.
And their poppy seed streusel and hazelnut-braid, oh my oh my, addiction for ever and ever.
Sunday, May 09, 2010
Mexican drinking chocolate
 Never return from Mexico without chocolate. I live by this wise rule. These are Mexican drinking chocolates I got when we were on the visit last time. Two are bought in a supermarket, one at the market and one at the airport. I liked three of them, but the fourth one (the largest disk) not so much as it was too sweet.
And I finally bought the traditional chocolate whisk, molinillo. The Mexican hot chocolate has to have a thick froth on the top (has to) and molinillo, together with some elbow grease, makes a wonderful froth...
 ...and it is a beautiful piece of wooden art as well.
Subscribe to:
Posts (Atom)